It can be said that creating photorealistic 3D portraits has always been a challenging and intricate process. To do this, it demands a high level of skill, attention to details, and powerful software. In the past, 3D artists faced significant obstacles in achieving truly lifelike 3D representation. Why? Just because of the limitations of rendering hardware and software. However, nowadays, advancements in modern technology, especially the advent of cloud render farms, have made this process much more accessible. Thanks to these innovations, 3D artists can produce incredibly realistic 3D portraits with greater ease, speed, and efficiency. In this blog, we’ll walk you through 5 essential steps in creating photorealistic 3D portraits. Let’s get started!
Step 1: Create the Foundations
The first step in creating a photorealistic 3D portrait is to establish a strong base for your model. Basically, this involves sculpting the basic shape and structure of the human face, ensuring that proportions are accurate and realistic. Start by gathering reference images that depict the subject from multiple angles. You can use tools like ZBrush or Mudbox to block out the basic structure of the face. Remember, paying close attention to key areas such as the eyes, nose, and mouth.
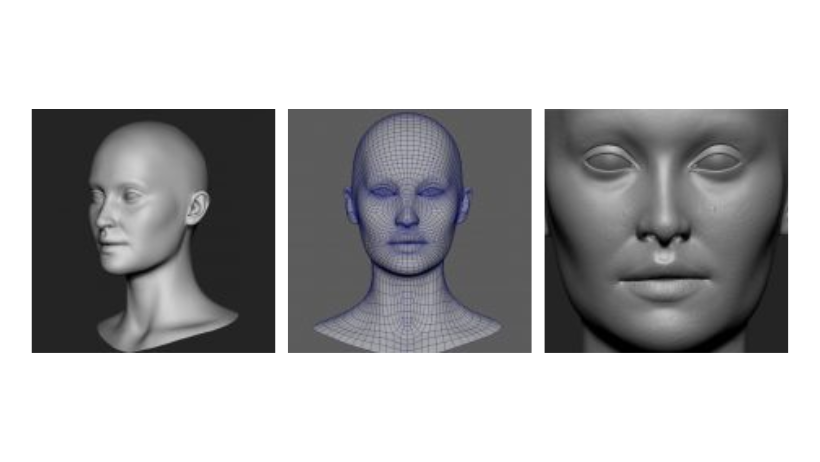
Source: CG Channel
Once the basic form is in place, you need to refine the details such as the cheekbones, jawline, and brow ridge. At this stage, the goal is to ensure that the model’s proportions are as true to life as possible. The reason why is that having a solid foundation will make it easier to progress through the later stages and achieve a lifelike appearance.
Step 2: Sculpt the Forms
With the base model in place, it’s time to refine the sculpture further. This is where you’ll add more detailed features such as the skin folds, wrinkles, and muscle structure. Tools like ZBrush allow for high-level detail work, enabling you to sculpt tiny skin pores, subtle creases, and lifelike facial expressions.
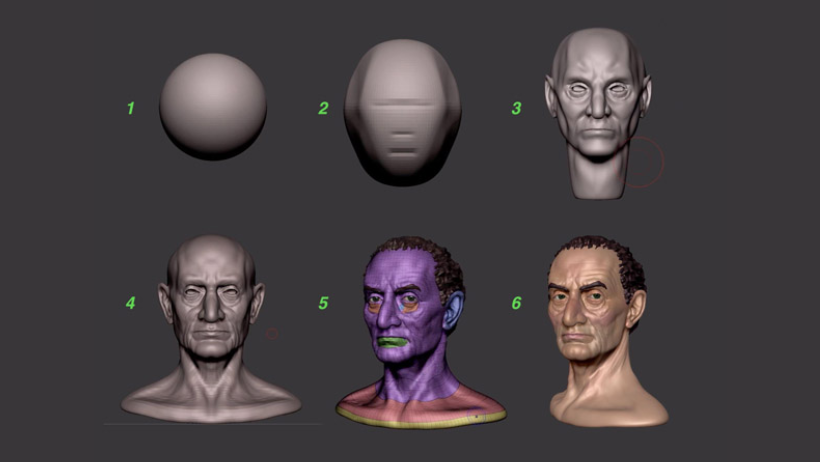
Source: CG Channel
During this step in creating photorealistic 3D portraits, you must focus on maintaining the accuracy of your model’s facial anatomy. The more precisely you sculpt the forms, the more realistic your portrait will look in the final render. At this stage, please be careful with symmetry, surface detail, and subtle variations in the face will elevate the photorealism of the final product.
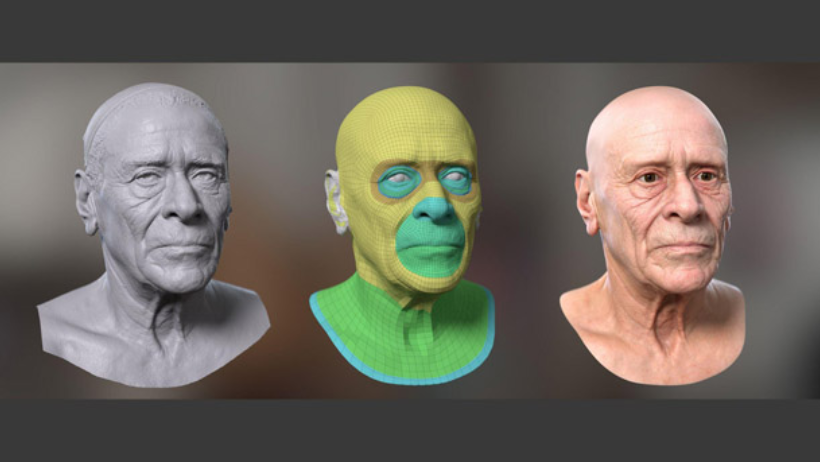
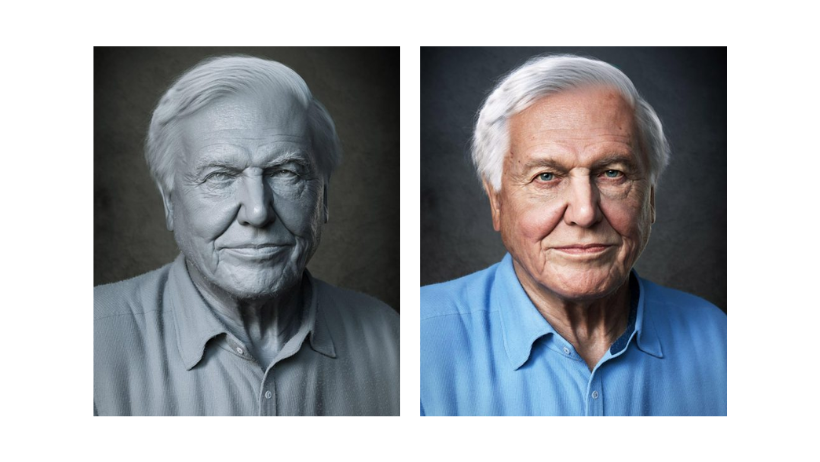
Step 3: Texture Your Character
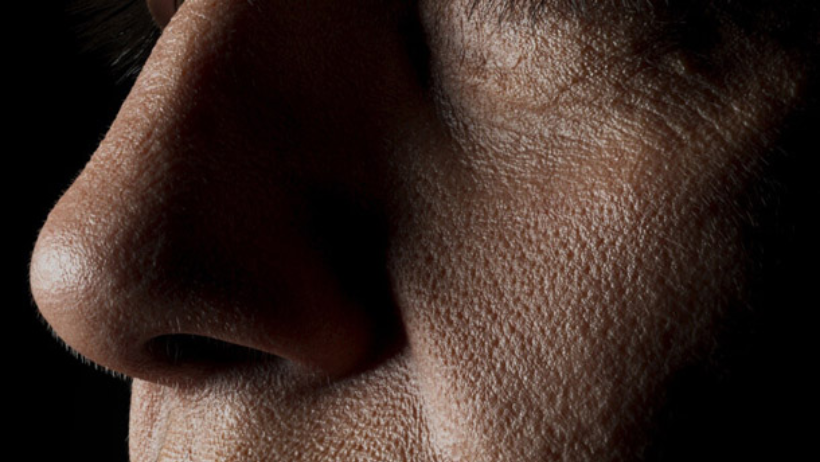
After sculpting your 3D portrait, it’s time to add textures. This step is crucial for achieving photorealism, as the texture of the skin, eyes, and hair plays a huge role in the final result. You want to create hyper-realistic textures for your model? Mari, a powerful texturing tool, is here to help you! This tool allows you to paint the textures directly onto your 3D model, providing immense control over the finer details, such as skin pores, freckles, and imperfections.
Source: CG Channel
Pay attention to the lighting and material properties of the textures, as these factors influence how the final portrait will look under different lighting conditions. When texturing, consider adding variations in skin tones, such as subtle redness around the nose or slight discolorations on the face, to create a more lifelike and dynamic appearance.
>>> Read more: Unleashing the Power of 3D Rendering: The Benefits, Animation, and Services
Step 4: Blender 3D Hair
Hair is one of the most challenging elements to master in a photorealistic 3D portrait. In this step, you’ll need to focus on creating realistic hair that matches the subject’s style and texture. Blender’s particle system is a great tool for simulating hair in 3D. Using this system, you can control the length, density, and direction of each strand of hair.
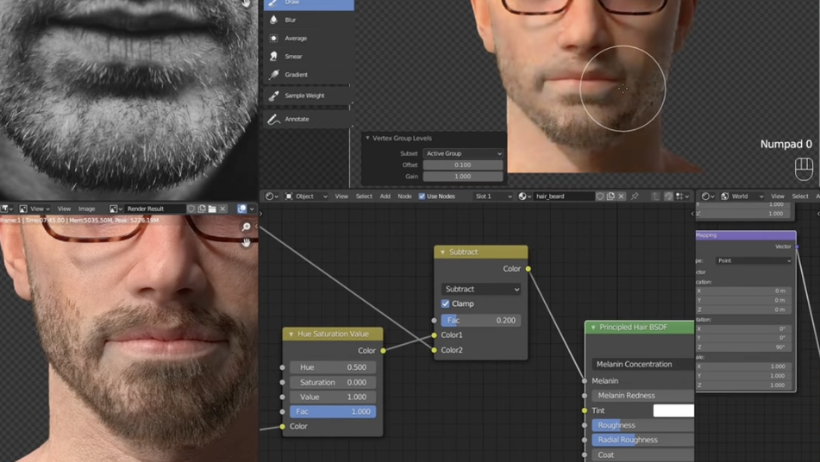
Source: CG Channel
Additionally, you can tweak the shading, lighting, and color of the hair to match the realism of the rest of the portrait. To make the hair look even more lifelike, experiment with adding slight variations in color, such as lighter strands or natural highlights. This will help your 3D portrait appear more dynamic and natural.
Step 5: Set Up the Lighting
Lighting plays a critical role in creating photorealistic 3D portraits. It’s important to choose a lighting setup that highlights the key features of your portrait, such as the eyes, nose, and mouth, while also ensuring that shadows and highlights are realistic.
Source: CG Channel
In this step, you’ll need to experiment with different light sources to achieve the desired effect. Three-point lighting is commonly used in portrait photography, which involves using a key light, fill light, and backlight to create a balanced and dynamic look. Focusing on how the light interacts with the textures, skin, and hair to achieve maximum realism.
Final Thoughts
Creating photorealistic 3D portraits is a multi-step process that requires precision, patience, and a deep understanding of both artistry and technology. From sculpting the foundations to adding textures, hair, and lighting, each step plays a crucial role. However, if you’re looking for a reliable and user-friendly render farm, 3S Cloud Render Farm is a top choice. With support for leading software like Blender, Maya, and Cinema 4D, combined with 24/7 customer support and scalable performance, 3S Cloud Render Farm helps you meet tight deadlines and bring your creative vision to life!