Introduction
If you want lifelike 3D scenes, you need PBR textures. They are now the standard for realism in games, films, and design. When paired with Blender, these textures bring depth, detail, and real-world accuracy to your projects.
This guide explains what PBR textures are, how they work, and how you can apply them in Blender. Whether you’re new to 3D or looking to refine your skills, you’ll learn how to create better scenes with ease.
What Are PBR Textures?
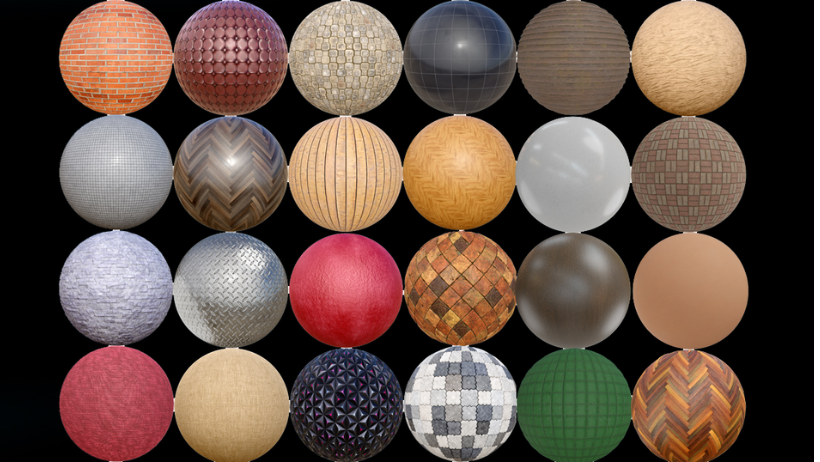
PBR (Physically Based Rendering) textures mimic how light interacts with real materials. They use maps to define how a surface reflects, absorbs, and scatters light.
Most PBR texture sets include:
- Albedo/Diffuse Map: The base color of the material
- Normal Map: Adds depth without geometry
- Roughness Map: Controls surface gloss
- Metalness Map: Defines metallic properties
- Ambient Occlusion (AO): Adds shadow detail
Together, these maps create materials that look accurate under any light setup.
Why Use PBR Textures?
There are many reasons to use PBR textures:
- They give realistic results
- They react to lighting changes
- They’re compatible with many engines and renderers
- They save time on manual tweaks
More importantly, most online asset libraries now offer PBR-ready materials. That means faster results with less effort.
Where to Get PBR Textures
You can find free and paid PBR texture libraries online. Some popular sources include:
- CC0 Textures / ambientCG
- Poly Haven
- Textures.com
- Quixel Megascans
Many of these offer textures in Blender-ready formats. You can download maps in high resolution, often with different tiling options.
How to Apply PBR Textures in Blender
Applying PBR textures in Blender is simple once you get the hang of it. Follow these steps:
1. Open Blender and Set Up Your Scene
Start a new project or open an existing one. Add your model and prepare it for shading.
2. Add a New Material
Select your object. Go to the Shader Editor and create a new material slot.
3. Load the Texture Maps
Use Image Texture nodes to load each map:
- Albedo to Base Color
- Roughness to Roughness input
- Normal Map needs a Normal Map Node
- Metalness to Metallic input
- AO can be mixed in for better shadow detail
4. Use the Principled BSDF Shader
Blender’s Principled BSDF supports all PBR texture maps. Just connect each one to the right slot.
5. Tweak and Preview
Switch to Rendered View to see how the textures behave. Adjust scale, tiling, or UV mapping as needed.
Common Mistakes and Fixes
Even with good PBR textures, you may run into issues. Here’s how to avoid them:
- Wrong Normal Map Color Space: Set it to “Non-Color” in Blender
- Low-Res Maps: Use at least 2K for clear detail
- Missing UVs: Ensure your model has proper UV mapping
- Unrealistic Results: Check lighting and shader settings
With practice, these problems become easier to solve.
Tips to Optimize PBR Textures
- Use texture atlases to reduce file loads
- Bake textures for simpler scenes
- Reduce resolution if not needed
- Use procedural blending for variety
These methods help speed up renders and reduce memory usage.
>>> Read more: Best RAM for 3D Rendering: Speed, Capacity, and Performance Compared
How Blender Supports PBR Workflows
Blender makes PBR easy with the Principled BSDF shader, real-time Eevee engine, and powerful Cycles renderer. These tools allow for fast previews and high-quality output.
Moreover, Blender supports asset libraries, node grouping, and baking tools. You can reuse textures across projects with ease.
How 3S Cloud Render Farm Helps
Once your scene is ready, you’ll want quick, smooth renders. That’s where 3S Cloud Render Farm comes in.
It supports Blender, PBR-heavy scenes, and large asset libraries. You can upload your .blend file, choose render settings, and get results in minutes.
👉 Try 3S Cloud Render Farm for Blender rendering
Conclusion
Understanding PBR textures is key to modern 3D design. When combined with Blender, they unlock stunning realism and creative control.
By learning how to apply and optimize them, you can build better scenes faster. And with tools like 3S Cloud Render Farm, your workflow becomes smoother than ever.
Now’s the time to explore PBR in Blender—and bring your visions to life with true detail.