If you’ve spent any time in the 3D world, you’re all too familiar with the agony of watching a render progress bar crawl. It’s a drag, especially when a deadline is looming. The good news is, with the continuous developments in Blender, speeding up your renders is more doable than ever. In this article, we’ll walk you through our top 5 tips to render faster in Blender, especially with Cycles, so you can keep your projects on track and on time.
Top 5 Tips to Render Faster in Blender in 2025
To get a quality final product without waiting forever, we recommend mastering these key optimization techniques. They’re a core part of any professional’s workflow for anyone who wants to render faster in Blender.
1. Switch to GPU Rendering
This is the biggest and most impactful change you can make. Don’t let your CPU do all the work—let your GPU handle the rendering. Modern GPUs from NVIDIA and AMD are built for massive parallel processing and will dramatically speed up your render times. Just a simple switch in your Blender preferences makes all the difference.
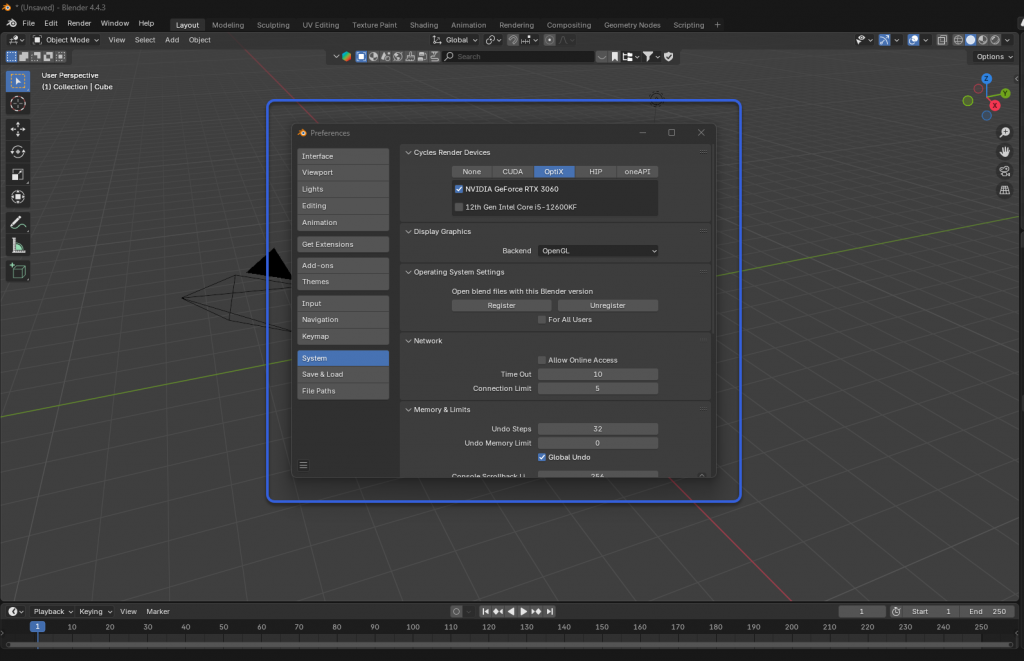
Go to Edit > Preferences > System > Cycles Render Devices:
- If you have an NVIDIA GPU, select either CUDA or OptiX.
- If you have an AMD GPU, select HIP.
- If you have an Intel GPU, choose oneAPI.
2. Optimize Your Light Path Settings
In the world of 3D rendering, realism comes with a price, and that price is often render time. The Light Bounces setting in Blender’s Cycles engine is a great example of this. It simulates how light bounces off surfaces, which is what makes a scene look so realistic. However, the default setting of 12 can be overkill and one of the biggest reasons for slow renders.
You can easily fix this by adjusting the Max Bounces total. We find that a value between 3 and 6 is usually sufficient to provide a great deal of realism without placing too much strain on your GPU.
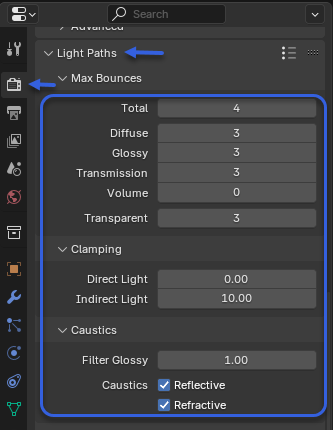
You can also fine-tune the settings for individual light path types like Glossy or Diffuse, which gives you even more control over your final render.
3. Activate Persistent Data
Persistent data acts like a smart cache for your renders. When you press the Render button, it saves the calculated data from the first frame of your animation and reuses it for the subsequent frames. This can significantly speed up your renders, sometimes by up to 5 times, because Blender no longer needs to recalculate static elements in every single frame.
A key thing to remember is that this feature works best for static scenes where objects aren’t moving. For this reason, it’s a perfect solution for architectural visualizations or still shots.
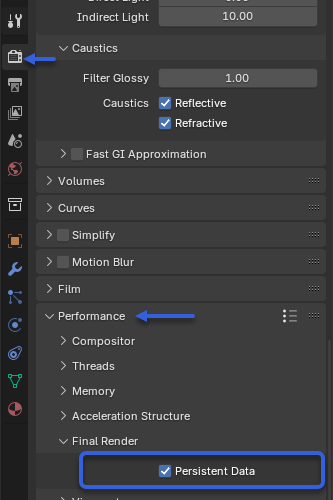
To enable it, just go to your Render Properties panel, navigate to the Performance tab, and check the box for Persistent Data under the Final Render section.
4. Optimize your HDRI Multi-Importance Sampling
If you’re using high-resolution HDRI environments, you might notice Blender slowing down when you first load them. That’s because it’s creating an “importance map” to identify the brightest areas of the HDRI, which helps Cycles render more efficiently and avoid noisy artifacts, or “fireflies.”
To get better control and a speed boost, you can manually adjust this setting.
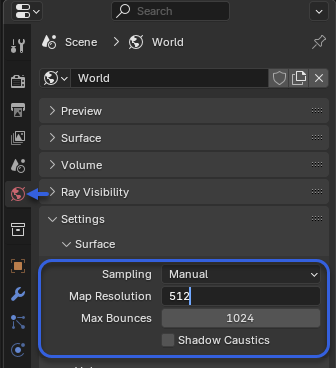
Go to your World settings, then the Settings tab. Change the ‘Sampling‘ setting from Auto to Manual and set the ‘Map Resolution’ to a value that works for you. A good starting point is 512 or 1024, which is high enough to prevent fireflies but low enough to avoid making Blender unresponsive.
5. Use an Efficient Output File Format
This may seem like a minor detail, but your choice of file format matters.
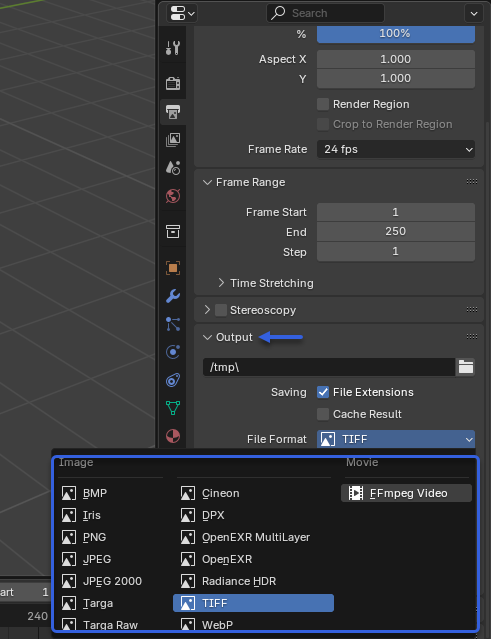
Instead of PNG, we recommend considering TIFF or OpenEXR for animation sequences. While they result in larger file sizes, they write data much faster, which can save you hours on a project with hundreds or thousands of frames. It’s a small change, yet surprisingly, it helps you render faster in Blender.
The Ultimate Tip: Use a Render Farm
Even with all these tips, your personal computer has its limits. When a project is huge or the deadline is tight, a single machine simply won’t suffice. This is where a Render Farm becomes your best friend. It’s the ultimate solution to render faster in Blender on a professional scale.
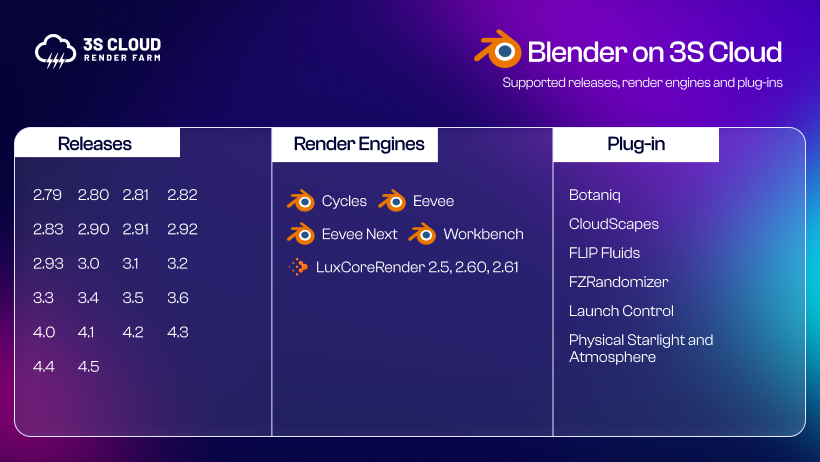
A render farm is a network of powerful computers working together to handle massive rendering jobs. And 3S Cloud Render Farm is a top-tier service that does just that.
We operate as a SaaS (Software as a Service) platform, supporting all Blender versions and render engines, including Cycles, Eevee, and Workbench, with some popular plugins. Instead of investing in expensive hardware, you simply upload your project file. Our system then automatically processes your job using the combined power of hundreds, or even thousands, of GPUs. It’s the most effective way to render faster in Blender.
To help you manage costs, we provide some great tools:
- Render Cost Estimator: Get an idea of your project’s estimated cost before you start.
- Free Preview Render: This feature is completely free and lets you render initial frames. It’s the perfect way to check your scene’s output and get a truly accurate cost estimate for your entire project.
With 3S Cloud Render Farm, you’re not just saving time; you’re freeing up your creativity from hardware limitations. It’s the ideal solution for any studio, 3D artist, or freelancer who wants to get their work done quickly and efficiently.
And right now, we’re offering a $5 Free Trial so you can test the service yourself.

👉 Sign up today and see the power and convenience firsthand!