Blender is one of the most powerful and free tools for 3D artists. However, creating a great final image with Blender 3D rendering takes more than just modeling. You need a smooth and clear workflow—from building your scene to finishing the final render. In this guide, we will walk you through every step of the Blender 3D rendering process. So if you’re ready to improve your work, let’s get started!
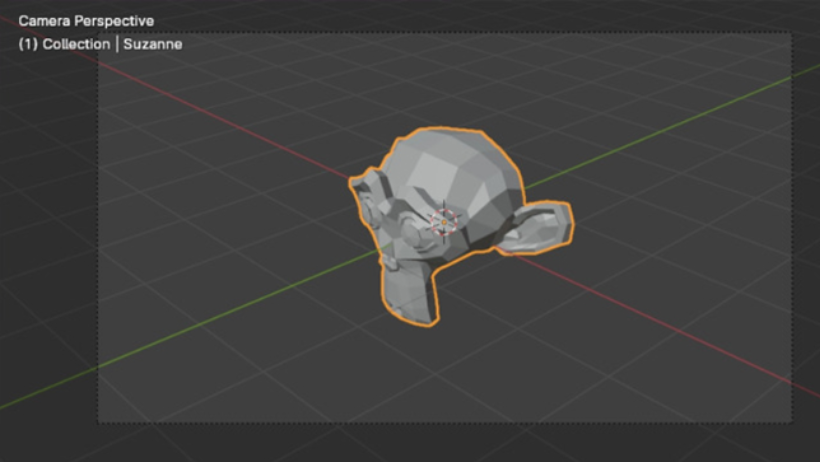
Step 1: Build a Strong Base Model
First of all, every great render starts with good modeling. Make sure your objects are clean, properly shaped, and have the right scale. Avoid messy geometry, because it can cause problems later.
If you’re working with complex scenes, try using collections and naming your objects clearly. This makes everything easier to manage as your project grows.
Step 2: Set Up the Scene Composition
Next, it’s important to plan how your scene will look. Ask yourself: What do I want the viewer to focus on?
To answer that, you can use the rule of thirds to position your main subject. Moreover, adding background and foreground objects gives depth to your scene. Always think about how the elements guide the viewer’s eyes.
Step 3: Add Realistic Lighting
Now that your scene is ready, it’s time to light it. Lighting can completely change how your image feels. That’s why it’s one of the most important parts of Blender 3D rendering.
Start with a simple setup like the three-point lighting (key light, fill light, and back light). After that, try adding an HDRI environment map to create more realistic reflections and shadows.

In addition, if you’re using Cycles, enable global illumination for more natural light behavior.
Step 4: Create High-Quality Materials
Then, let’s move on to materials. A beautiful model won’t look real without the right textures and shaders.
Use the Principled BSDF shader to create most materials in Blender. Furthermore, apply PBR (Physically Based Rendering) textures to make surfaces look real under different lighting conditions.
Also, don’t forget about normal maps and roughness maps. These details can make a big difference, even if your object has a simple shape.
Step 5: Choose the Right Camera Settings
Before rendering, take a moment to set up your camera properly. Think of it like a photographer choosing the best angle.
For example, using depth of field can blur the background and help focus attention. Meanwhile, changing the focal length can add drama or realism to the shot. Therefore, play with different settings until the composition feels just right.
Step 6: Adjust Render Settings
Once everything is in place, you’re ready to fine-tune your Blender 3D rendering settings.
First, choose your render engine—Cycles for high realism, or Eevee for real-time speed. Then, increase the sample rate for less noise, and enable denoising with tools like OptiX or OpenImageDenoise.
Also, make sure your output resolution is high enough. If you’re rendering for print or large displays, this matters a lot.
Step 7: Use Compositing for Final Touches
After rendering the image, you’re not done yet. In fact, the Compositor tab in Blender allows you to improve your image further.
You can adjust brightness, contrast, color balance, and more. Plus, using render passes gives you more control over shadows, reflections, and lighting. As a result, your final image will look more polished and professional.
Step 8: Optimize for Faster Rendering
Of course, rendering can take a long time. But there are many ways to speed things up without losing quality.
For instance, use render layers, lower unused light bounces, or reduce the number of heavy objects in the background. Additionally, choosing between CPU or GPU rendering can make a huge difference, depending on your hardware.
If your machine can’t handle it, don’t worry—there’s a better option!
Bonus: Use 3S Cloud Render Farm
At this point, if your render times are still too long, it might be time to try cloud rendering. At 3S Cloud Render Farm, we offer powerful servers designed for Blender 3D rendering. Whether you’re using Cycles or Eevee, our platform helps you finish your projects faster and with better quality—at a very affordable cost.
You don’t need expensive hardware. Just upload your file, hit render, and let our machines do the heavy lifting.
Conclusion
To sum up, mastering the Blender 3D rendering workflow takes time and practice. But by following each step—modeling, lighting, materials, camera setup, rendering, and post-processing—you can create stunning results.
Don’t forget: performance matters too. So, if your computer isn’t powerful enough, you can always rely on 3S Cloud Render Farm to get the job done quickly and affordably.
Are you ready to bring your Blender projects to life? Try 3S Cloud Render Farm today and render smarter, not harder!
>> Read more: 3D Rendering Tutorial for Beginners: A Step-by-Step Guide