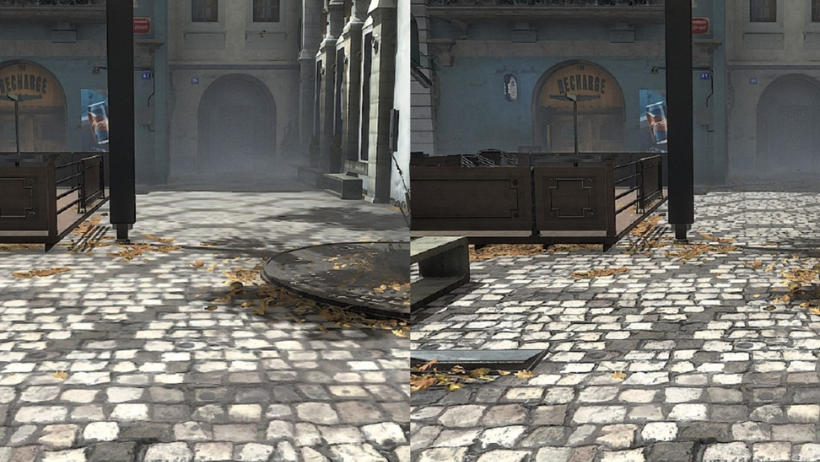
When creating high-quality 3D graphics, one thing that often gets overlooked is texture filtering. However, this small feature plays a big role in how your final render looks. Whether you’re designing a game level, an architectural scene, or an animated film, understanding texture filtering helps you produce sharper, cleaner, and more professional visuals.
In this article, we’ll break down what texture filtering is, how it works, and why it matters for your 3D projects.
What Is Texture Filtering?
In simple terms, texture filtering is a method that improves how a texture (an image mapped onto a 3D object) appears when viewed from different distances and angles. Without filtering, textures might look blocky, blurry, or distorted.
Every 3D model has textures applied to it. But when those models move, rotate, or zoom in and out, the pixels on the screen don’t always align perfectly with the texture pixels (texels). This is where filtering comes in—it helps your textures look smooth and clear, no matter how you view them.
Types of Texture Filtering
Let’s look at the four main types of texture filtering. Each one offers a different level of image quality and performance impact.
1. Nearest-Neighbor Filtering
This is the simplest method. It picks the texel closest to the pixel on the screen.
Pros: Very fast, uses little GPU power.
Cons: Creates rough, blocky edges—especially during motion.
2. Bilinear Filtering
This method uses the four closest texels and blends their colors for smoother results.
Pros: Makes textures look softer and less pixelated.
Cons: Can look blurry, especially when textures are viewed at sharp angles.
3. Trilinear Filtering
Trilinear filtering improves on bilinear by also blending between different mipmap levels (smaller versions of the original texture).
Pros: Reduces visible changes in texture detail during zooms or camera shifts.
Cons: Uses more GPU resources.
4. Anisotropic Filtering
This is the most advanced method. It adjusts how textures are sampled based on the viewing angle.
Pros: Keeps textures sharp, even at extreme angles (like a road seen from far away).
Cons: Heavier on the GPU, but modern hardware handles it well.
How Mipmaps Help with Texture Filtering
Mipmaps are smaller, pre-rendered versions of your texture. They’re used when a texture is far away from the camera.
When combined with filtering, mipmaps improve both visual quality and performance. For example:
- Bilinear + mipmaps: Faster and smoother results.
- Trilinear filtering: Adds better transitions between texture levels.
- Anisotropic filtering: Uses mipmaps wisely to avoid blurring at long angles.
Where Texture Filtering Is Used
Texture filtering isn’t just for games—it’s essential in many types of 3D projects.
In Video Games
Filtering keeps textures sharp during movement, reducing flickering and making environments feel more real.
In Architectural Visualization
When rendering floors, walls, and large surfaces, filtering ensures textures don’t blur or lose detail, even in wide-angle views.
In Product Design
High-quality renders depend on accurate surface details. Filtering makes materials like metal, glass, and fabric look realistic.
In Animation and Film
For pre-rendered content, texture filtering prevents strange visual artifacts, helping each frame look polished and smooth.
In VR and AR
Because users move their heads quickly in VR, filtering helps prevent shimmering and motion blur, making the experience more comfortable.
Performance vs. Quality: What to Choose?
If you’re working on a project that needs high quality and realism, go for anisotropic filtering. Yes, it uses more GPU power—but the results are worth it, especially for professional renders.
On the other hand, if you’re creating something simple or need fast performance, bilinear or trilinear filtering might be enough.
Keep in mind: Modern rendering engines (like Blender, Unreal Engine, or Unity) give you full control over filtering settings. You can balance quality and speed based on your needs.
Conclusion
Texture filtering may be behind the scenes, but it has a huge impact on how your 3D project looks. By choosing the right filtering method, you can avoid blurry surfaces, blocky edges, and visual noise.
If you’re working on complex scenes or professional renders, consider using a cloud render service like 3S Cloud Render Farm. Our high-performance GPU nodes support advanced texture filtering, helping you produce clean, detailed renders—fast.
>> Read more: Texture Atlas: Optimizing Textures in 3D Rendering
