Photorealistic rendering services are essential for anyone looking to create realistic and impressive 3D visuals. Whether you are an architect, product designer, or real estate developer, these services help turn your ideas into lifelike images that capture every detail. In this blog post, we will explain what photorealistic rendering is, why it matters, and how to use it effectively.
What is Photorealistic Rendering?
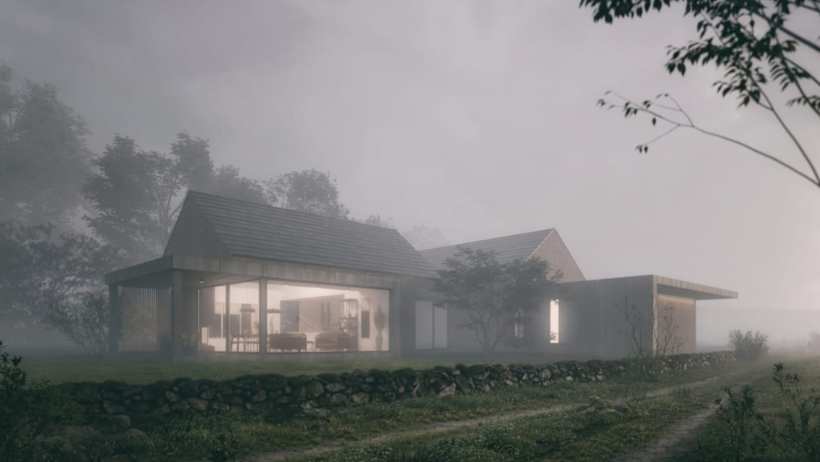
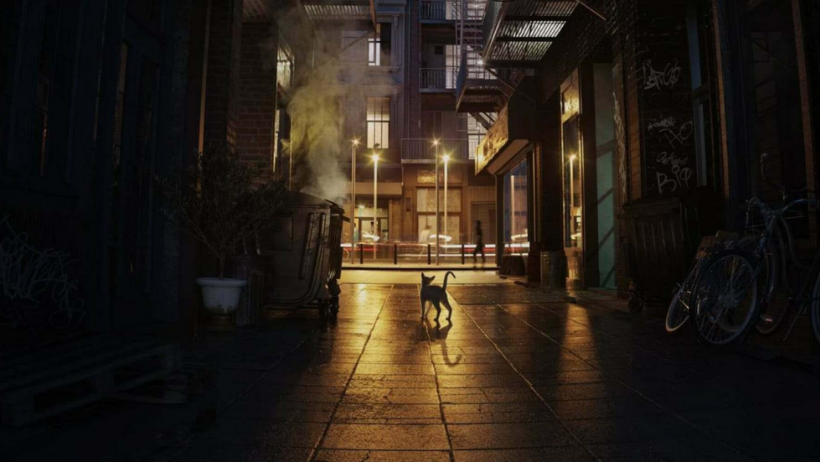
Photorealistic rendering is the process of creating images that look just like real photos. These images are created using advanced 3D software and powerful rendering engines. In simple terms, it means taking a digital model and making it appear so real that you can hardly tell it apart from a real photograph. This is especially useful for presenting ideas before they are built.
Why Choose Photorealistic Rendering Services?
There are many reasons to use photorealistic rendering services. First, they allow you to present your design ideas clearly. For example, clients can see what a new house or product will look like before it exists. This can help with decision-making and improve communication between designers and clients.
Second, photorealistic images are great for marketing. Because they look so real, they are more attractive and engaging. As a result, they can help promote your project on websites, social media, or in print materials.
Finally, these services save time and money. Instead of building a physical prototype, you can test and show different design ideas quickly through realistic renderings.
Key Elements of Photorealistic Rendering
To create photorealistic renderings, several elements must work together:
1. Lighting: Lighting is one of the most important aspects. With proper lighting, your design will look natural and convincing. For instance, sunlight streaming through windows or soft shadows around objects adds depth and realism.
2. Textures and Materials: Another key part is texture mapping. This technique adds realistic surfaces like wood, metal, or glass to your 3D model. By using bump maps or displacement maps, you can also add details like scratches or roughness to make materials look more authentic.
3. Camera Angles and Composition: Choosing the right viewpoint is also important. A good camera angle highlights the best features of your design. Additionally, techniques like leading lines or the rule of thirds can guide the viewer’s eyes.
4. Post-Processing: After rendering, post-processing adds the final touches. This may include adjusting colors, adding sunlight, fog, or even small details like reflections. As a result, your render looks clean and professional.

When to Use Photorealistic Rendering Services
Photorealistic rendering is helpful in many situations. For example:
- Architects use it to show how buildings will look.
- Product designers use it to display new products.
- Real estate developers use it to market properties.
- Interior designers use it to visualize spaces before construction.
In short, if you need to show something before it exists, photorealistic rendering is the way to go.
Benefits of Cloud Rendering
To make the rendering process faster and more efficient, many professionals use cloud rendering services like 3S Cloud Render Farm. With cloud rendering, you can upload your project and let powerful remote servers do the work. This means:
- Faster rendering times
- No need for expensive hardware
- More time to focus on design instead of waiting for renders
Moreover, using a cloud render farm ensures your images are high-quality and delivered on time, even for large and complex scenes.
Conclusion
Photorealistic rendering services are changing how we present and communicate 3D designs. Thanks to advanced tools and cloud technology, it is easier than ever to bring your ideas to life with hyper-realism. By focusing on lighting, textures, and composition, you can create stunning visuals that not only look real but also tell a compelling story. If you’re ready to take your 3D projects to the next level, consider using 3S Cloud Render Farm to power your next photorealistic rendering.
>> Read more: 3D Rendering Tutorial for Beginners: A Step-by-Step Guide