Have you ever created a sketch you loved, only to struggle when turning it into a digital version? Or maybe you’ve downloaded an image but couldn’t resize it without losing quality? Don’t worry—image tracing is here to help!
In this blog post, we’ll explain what image tracing is, why it’s useful, and how you can do it easily using Adobe Illustrator. By the end, you’ll be able to turn any pixel image into a clean, scalable vector graphic. Let’s get started!
What is Image Tracing?
First of all, let’s understand the difference between pixel images and vector graphics.
When you zoom in on a photo or JPG image, you’ll notice that it becomes blurry or pixelated. That’s because it’s made up of thousands of tiny squares called pixels. The more you zoom, the more these pixels show, and the image quality goes down.
On the other hand, vector graphics don’t use pixels. Instead, they are created using mathematical paths. This means you can scale them to any size without losing quality. Whether it’s for logos, illustrations, or printed designs—vector images always stay sharp.
And that’s exactly where image tracing comes in. It converts pixel-based images into smooth, editable vector files. Sounds great, right?
Why Use Image Tracing?
Image tracing saves you time and effort. Instead of manually drawing outlines with the Pen Tool, you can turn your drawing, photo, or scanned sketch into a vector in just a few clicks.
It’s perfect for:
- Digitizing hand-drawn sketches
- Creating logos from images
- Making illustrations for websites, prints, or animations
- Preparing files for high-resolution rendering (yes, even in the cloud!)
How to Use Image Tracing in Adobe Illustrator
Now, let’s walk through the steps. Even if you’re new to Illustrator, don’t worry—we’ll keep it simple.
Step 1: Open Your Image
Start by opening Adobe Illustrator. Create a new document and use File > Place to insert your image onto the artboard. You can adjust the size and position if needed.
Step 2: Open the Image Trace Panel
Go to Window > Image Trace to open the Image Trace panel. This tool is where all the magic happens!
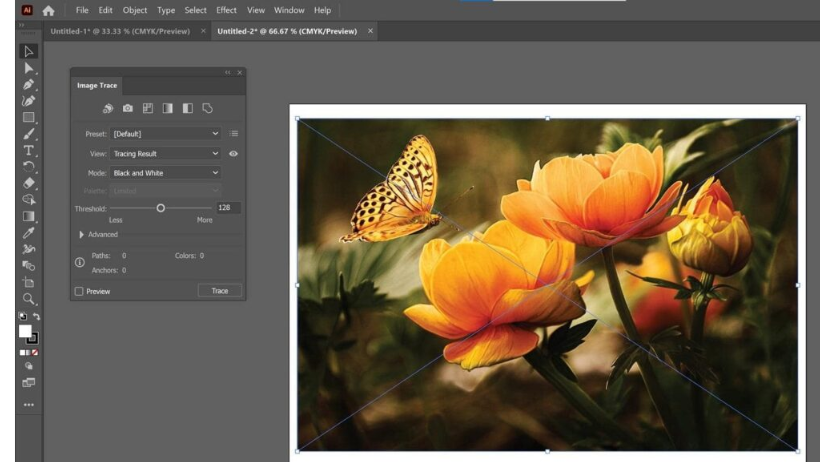
Step 3: Turn on Preview
Click on your image to activate it. Then, check the Preview box in the panel. This shows you a live preview of the vector result.

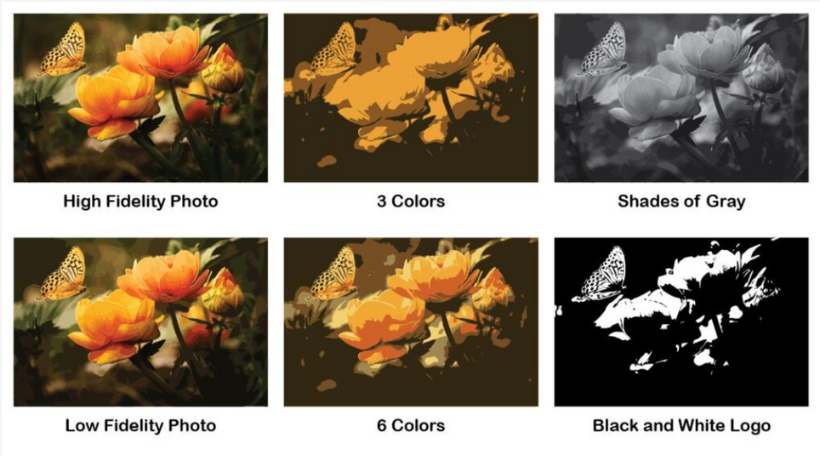
Step 4: Choose a Preset
Illustrator offers several presets to make your life easier:
- High Fidelity Photo – For detailed, photo-like results
- Low Fidelity Photo – For a simplified version
- 3 Colors, 6 Colors, 16 Colors – For a cartoon or poster-style look
- Black and White – Great for logos or simple graphics
- Line Art / Sketch Art – Ideal for hand-drawn outlines
Choose the one that best fits your image style.
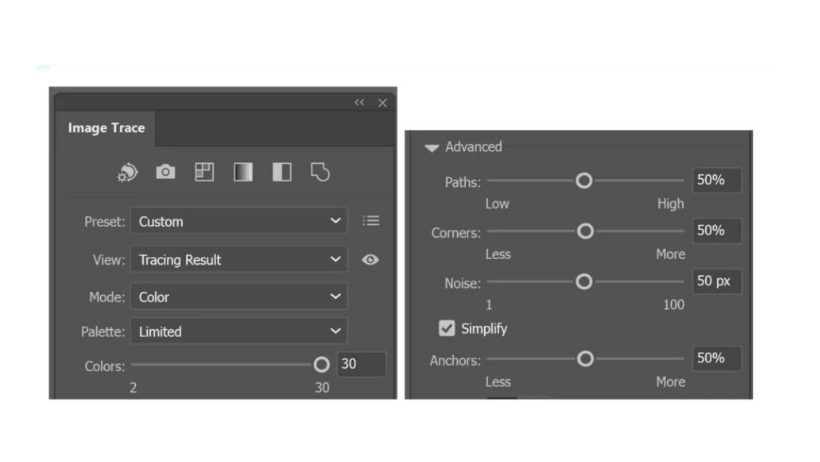
Step 5: Adjust the Settings
You can tweak settings like:
- Mode – Color, Grayscale, or Black & White
- Threshold – Controls black/white balance
- Paths, Corners, and Noise – These affect how smooth or detailed your vector is
Play around until it looks just right.
Step 6: Click Trace
Once you’re happy with the preview, uncheck Preview (to unlock the button), then click Trace. The software will now convert your image into a vector.
Step 7: Expand the Image
Go to Object > Expand to finalize the vector paths. Now, your image is fully vectorized and ready for editing.

Step 8: Make Edits (Optional)
To change colors, shapes, or move parts around, simply right-click > Ungroup the vector. This gives you full control to edit every piece of the artwork.
Step 9: Export Your Vector File
Lastly, go to File > Save As and choose SVG to export your file. SVGs are perfect for the web, print, and even 3D rendering projects.
Bonus Tip from 3S Cloud Render Far
If you’re working with complex illustrations or preparing assets for 3D environments, vector graphics are a smart choice. They are lightweight, clean, and resolution-independent—perfect for use in cloud rendering pipelines like ours at 3S Cloud Render Farm.
Conclusion
Thanks to image tracing, turning your ideas into high-quality vector graphics has never been easier. So why not give it a try? Grab your sketch or photo, open Illustrator, and see what amazing designs you can create.
And if you’re rendering artwork in 3D, animation, or virtual environments, don’t forget—3S Cloud Render Farm is here to support your creative journey with fast, reliable, and scalable rendering solutions.
>> Read more: Real-time rendering and ray tracing on render farm