Creating realistic 3D models is a crucial skill in the world of 3D art, and one of the best projects to start with is the classic 3D donut. This popular project for beginners in Blender helps you learn the basics of modeling, texturing, and lighting—essential tools for creating impressive 3D art. In this guide, we’ll walk you through the steps to make a realistic 3D donut in Blender, from the modeling stage to adding textures and setting up the lighting.
Step 1: Modeling the Donut Shape
The first step to making a realistic 3D donut is modeling the basic shape. Blender offers easy-to-use modeling tools that allow you to create smooth and detailed objects. Here’s how to get started:
Create the Donut Base:
- Open Blender and delete the default cube by selecting it and pressing X.
- Press Shift + A to open the Add menu, and select Mesh > Torus. A torus is the perfect base for creating a donut shape.
- In the Add Torus panel at the bottom-left of the viewport, increase the Major Segments to around 50 and Minor Segments to 25 to create a smooth, round shape.
- Press S to scale the torus and adjust its size to match your desired donut proportions.
At this point, you should have the basic donut shape. However, this is just the beginning. To make it look more realistic, we will now add smoothness and details.
Step 2: Adding Smoothness with Subdivision Surface
To make the donut look smooth and realistic, we’ll use the Subdivision Surface modifier. This modifier will round out the edges of the donut and give it a polished appearance.
Apply the Subdivision Surface Modifier:
- With the torus selected, go to the Modifiers tab in the properties panel (the wrench icon).
- Click Add Modifier and select Subdivision Surface.
- Set the View and Render values to 2 or 3 to make the shape smoother.
- Press Tab to enter Edit Mode, and then use Ctrl + R to add loop cuts for additional edge control. This step will allow you to shape the donut more effectively.
Once you apply the Subdivision Surface modifier, you will notice the donut’s edges become much smoother, adding realism to the shape.
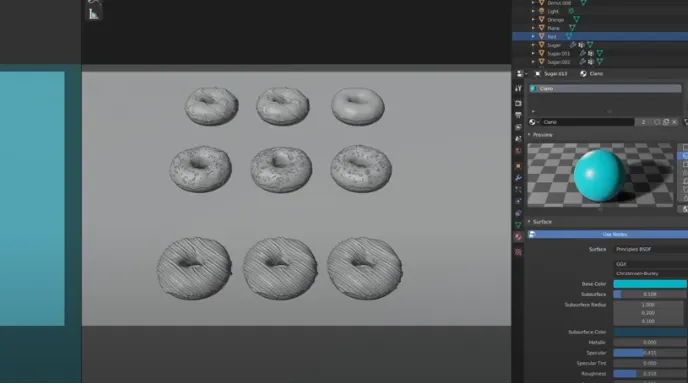
Step 3: Adding the Glazed Texture
To make your donut look even more realistic, we will add textures. The first texture we’ll apply is a glazed material for the donut’s outer layer.
Create the Glazed Material:
- Go to the Materials tab and click New to create a new material for the donut.
- Change the Base Color to a light brown or golden hue to replicate the typical color of a donut.
- Adjust the Roughness to 0.2 or 0.3 for a slightly glossy look, simulating the shiny surface of a donut glaze.
- To make the glaze more realistic, add a Glossy Shader and mix it with the existing Principled BSDF Shader using a Mix Shader node in the Shader Editor. This will give your donut its glossy, wet look.
Add the Glazed Look:
You can make the glaze more realistic by adding a Noise Texture for the surface imperfections. This mimics the unevenness found on real donut glazes.
Step 4: Creating the Sprinkles
No donut is complete without sprinkles! For this step, we will model a few sprinkles and add them to the donut.
Add and Position the Sprinkles:
- Press Shift + A and select Mesh > Cube to create a small cube for the sprinkle.
- Scale the cube to make it long and thin, then position it on the donut.
- To add multiple sprinkles, use the Array Modifier to create copies of the original sprinkle. You can control their positioning by adjusting the parameters in the Array Modifier.
- Apply a separate material for the sprinkles, choosing a bright color like pink, blue, or yellow to mimic real donut sprinkles.
Step 5: Setting Up Realistic Lighting
Now that you have the donut modeled and textured, it’s time to set up the lighting. Proper lighting is essential for bringing out the details of your 3D donut and making it look realistic.
Set Up the Lighting:
- Press Shift + A to add a light source. Choose Area Light to create a soft, even light.
- Position the light slightly above the donut, and increase its Power to 1000 for a brighter effect.
- To soften the shadows, increase the Size of the light.
- You can also add an HDRI (High Dynamic Range Image) to the world background for environmental lighting. This provides realistic lighting and reflections.
Lighting Tips:
- Use three-point lighting by adding two more lights: one from the side for fill light and one from behind the donut for backlighting.
- Play around with the light intensity and shadow softness to get the desired look.
Step 6: Rendering the Donut
Once you are satisfied with your donut, it’s time to render it. Blender offers two rendering engines: Eevee for real-time rendering and Cycles for more accurate, photorealistic rendering. For the most realistic donut, we recommend using Cycles.
Render Your Donut:
- Go to the Render Properties tab and select Cycles as the rendering engine.
- In the Output Properties, set the resolution to 1920×1080 for high-quality output.
- Press F12 to start the render. Blender will now process your donut and produce a realistic final image.
>>> Read more: Blender vs Cinema 4D: Which One is Better for 3D Artists?
Conclusion
With these steps, you’ve successfully created a realistic 3D donut in Blender! You’ve learned how to model, texture, and light your donut for a professional look. By experimenting with different textures and lighting setups, you can continue to improve your 3D donut and apply the techniques to other projects.
If you’re looking to speed up your rendering process for complex scenes, consider using 3S Cloud Render Farm. With its cloud-based rendering solutions, 3S Cloud Render Farm allows you to render your projects faster and with superior quality, saving you time and resources on your creative journey.