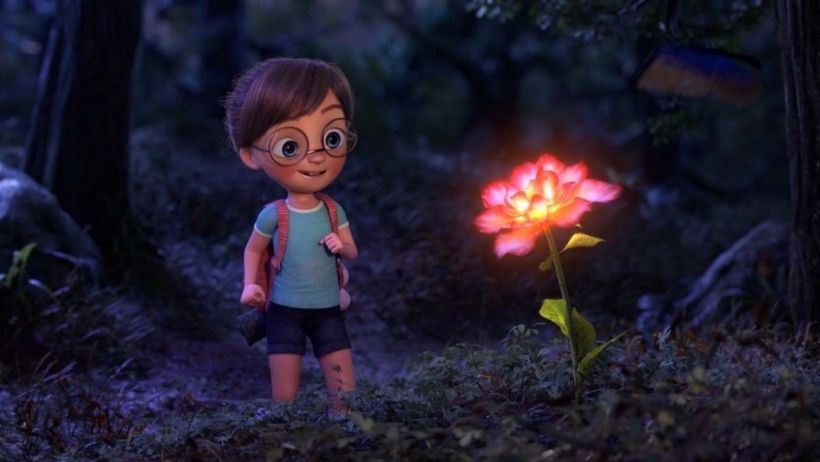
3D animation has changed the way we tell stories. From movies to TVC, 3D animation is everywhere. It creates emotion, grabs attention, and makes ideas come alive. But many beginners wonder—how to make a 3D animation video? In this complete blog, 3S Cloud Render Farm’ll walk through every step. You’ll learn how to start from scratch, what tools to use, and how to turn your ideas into animated videos. Now, let’s get started!
Is 3D Animation Easier than 2D Animation?
This is one of the most common questions beginners ask. Before learning how to create 3D animation video, it’s important to understand the difference.
2D Animation
2D animation works in a flat space. It uses height and width, like a drawing on paper. Classic cartoons are examples of 2D animation. In 2D, you need to draw every movement frame by frame. If a character waves their hand, the animator must draw each stage of that movement. Even a short animation may need hundreds of frames. 2D is great for artists who love to draw. But it requires strong drawing skills and lots of time.
3D Animation
In 3D animation, you build characters and scenes in a three-dimensional space. You create a digital model, then move it around. Instead of redrawing every frame, you animate using something called “keyframes.” These tell the computer where the character should be at a certain time. The software fills in the movement between keyframes. You also get tools to control lighting, materials, camera angles, and special effects. This adds realism without needing to draw everything by hand.
So, is 3D animation easier than 2D? It depends. If you enjoy drawing by hand and love traditional art, 2D may feel more natural. But if you prefer working with software and digital tools, you might find 3D animation easier and more flexible. 3D animation takes time to learn, especially the tools. But once you understand the workflow, it can be faster and more efficient.
How to Create 3D Animation Video?
Let’s break down the full process of how to make 3D animation video into manageable steps. These are the same steps used by professionals in film and gaming.
#Step 1: Plan Your Story and Write a Script
Every animation starts with a story. What do you want to say? Who are the characters? What happens in your video?
Write a script. It can be short or long, depending on your project. Even a one-minute video needs a solid plan. Focus on these parts:
- What is the setting?
- What action takes place?
- What emotions do you want the viewer to feel?
#Step 2: Sketch a Storyboard
A storyboard is a visual version of your script. It’s like a comic strip that shows what each scene will look like. You don’t need to be a great artist. Stick figures are fine. The goal is to plan camera angles, scene changes, and actions before you start animating. This step helps prevent mistakes later.
#Step 3: Choose Your 3D Software
Now it’s time to pick your tools. There are many 3D programs available. Some are free, and others are used by professionals.
Popular options include:
- Blender (Free and open-source. Great for beginners.)
- Autodesk Maya (Used in film and games. Paid.)
- Cinema 4D (Great for motion graphics.)
- 3ds Max (Powerful modeling tools.)
If you’re new to how to create 3D animation video, Blender is a great place to start. It has everything you need.
#Step 4: Model Your Characters and Objects
Modeling is the process of creating 3D shapes. You build everything: characters, houses, trees, props—whatever appears in your scene. Start with basic shapes like cubes, spheres, and cylinders. Then add details. Sculpt the body, adjust proportions, and refine the forms. This part takes time, especially for characters. If you want to save time, use free or paid 3D assets available online.
#Step 5: Add Materials and Textures
Materials define how objects look. Textures give them surface detail.
For example:
- A wooden table needs a wood texture.
- A glass cup should reflect light.
- Skin should look soft and smooth.
In this step, you make everything feel real. You control color, shine, roughness, and transparency. This is where the look of your 3D animation video starts to take shape.
>>> Read more: Animation Rendering: Key Techniques, Types, and Optimization Tips
#Step 6: Rigging and Skinning
Rigging adds bones to your character. These bones let you move the body. Skinning connects the 3D model to the bones. Imagine your character like a puppet. The bones are the strings. When you move a bone, the body moves. Rigging can be tricky. Some tools, like Mixamo, offer auto-rigging. That helps a lot if you’re new to it.
#Step 7: Start Animating
Now the fun begins. This is where you bring your characters to life. You use “keyframes” to set positions, movements, and actions. The software calculates how the character moves between these points.
Start with simple movements:
- Walking
- Waving
- Talking
- Turning
Then add more complex actions. Animation is about timing and emotion. Even small movements, like a blink or a sigh, can make your video more powerful. If you’re learning how to make 3D animation video, this step takes practice. Don’t rush it.
#Step 8: Add Lighting
Lighting sets the mood. It helps viewers focus on the right parts of the scene. Try different light types:
- Sunlight
- Spotlights
- Area lights
Use warm light for cozy scenes. Use cool light for dramatic or dark scenes. Proper lighting can make a simple scene look cinematic.
#Step 9: Add Camera Movements
Think like a film director. Use the camera to follow the action. You can:
- Zoom in or out
- Pan left or right
- Follow a moving character
Camera motion adds emotion and energy to your scenes. It also helps viewers feel connected.
#Step 10: Simulate Effects
If you want your 3D animation video to include fire, smoke, rain, or cloth movement, you need simulations. These are advanced effects. They need more computer power and time.
Examples:
- Cloth blowing in the wind
- Hair moving while running
- Glass breaking during action scenes
#Step 11: Render Your Animation
Rendering is the process of turning your scene into a video. This is when your computer processes all the lighting, textures, animations, and effects. The result is a series of images or a full video file. Rendering can take a long time. Some scenes need hours to complete—just for a few seconds of video. If you wanna decrease your render time, 3S Cloud Render Farm is one of the best choice. We support a wide range of 3D rendering software, from Blender, Maya to Cinema 4D. Use low settings for test renders. When you’re happy, switch to high quality for the final version.
#Step 12: Edit and Add Sound
After rendering, bring your scenes into a video editor. Here you:
- Cut and arrange shots
- Add sound effects
- Sync music and voiceovers
- Add transitions and credits
Use tools like:
- Adobe Premiere Pro
- DaVinci Resolve
- Final Cut Pro
Sound is powerful. It changes how people feel about your animation.
Final Thoughts
Creating a 3D animation video is a journey that combines storytelling, creativity, and technology. It may seem complex at first, but once you break it down into clear steps, it becomes much more manageable.
You’ve now learned how to make 3D animation videos from start to finish. You understand what tools to use, what skills to practice, and how to bring your ideas to life in a 3D space. Whether you’re a beginner using Blender or a pro working with Maya, the process remains rooted in planning, patience, and consistent learning.
3S Cloud Render Farm – Your Trustworthy 3D Rendering Partner
If you’re looking for a reliable and user-friendly render farm, 3S Cloud Render Farm is a top choice. With support for leading software like Blender, Maya, and Cinema 4D, combined with 24/7 customer support and scalable performance, 3S Cloud Render Farm helps you meet tight deadlines and bring your creative vision to life!
>>> Read more: Grease Pencil in Blender: The Future of 2D/3D Hybrid Animation